This is the time of year when I always long for new home decor. My magazines subscriptions are starting to fill with pictures of brightly coloured pillows, curtains and artwork to welcome spring. I envy those homes with a clean, white palette that is easily changed with a few throw pillows and some curtains. In hindsight, I should have purchased monochromatic furniture and artwork had I known how much I love redecorating!
Even though my homes colour palette is pretty much set in stone, that doesn’t mean I can’t make a few small changes to brighten it up for spring! I decided to get some new curtains that pick up my burgundy accent colour. I found some that I loved, for $50 a panel! No way was I going to spend $100 on curtains when I already had some that worked perfectly fine. Off to the fabric store I went and I raided the bargain section! I brought my throw pillow with me and found a pretty good match for $2 a meter! I purchased 2.5 meters and a package of grommets for $3 and I had new curtains for under $10!
So here is how you can give your home a splash of spring time, even if you don’t sew!
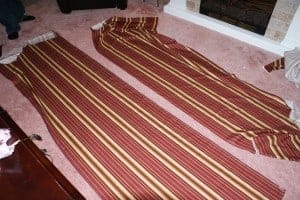
Step One: Lay your fabric out on a large surface, I used the floor. Cut your fabric to the length you want. I like my curtains to go from ceiling to floor, so each panel needed to be 8 feet. I was feeling cheap so I cut the bolt up the middle to create two thinner panels. They are cheater panels and are not wide enough to close all the way, but I have blinds and use curtains only for looks anyways!

Step Two: Fold the edges over (about a half inch or so) and sew or use iron on fuse tape to make the edges neat. I did the top and sides of the panels first and left the bottom for last, just to be sure I got the perfect length.
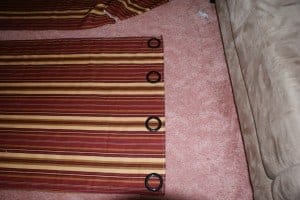
Step Three: Lay out your grommets where you want them to go and trace the inside circles onto the fabric with a pen, marker or whatever you have! I only used 4 grommets from each panel because they are just cheater panels (I’m totally making that up, I have no idea what they are called…cheapskate curtains)! I space them evenly apart starting with the first and last one about 1/2 inch from the edge. You could measure to ensure they are placed perfectly…I did not 🙂
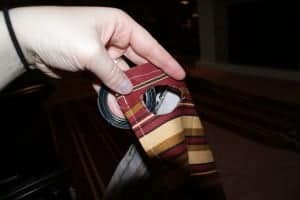
Step Four: Cut out the circles and attach the grommets! They are so easy to put on. Use the side of the grommet with the little lip on it (not the teeth looking one). Now slide the cut out circle around the lip. Place the teeth part of the grommet on top and press together. Snap! That’s all there is too it!
Step Five: Hang the curtains on your rod and decide where you want to cut and hem the bottom! Volia! Homemade curtains in under an hour for Under $10!!
BEFORE
AFTER


