Hate your kitchen? Why not do a mini makeover that can have a HUGE impact! I recently gel stained my cabinets and while it did take 9 days total, it was A LOT easier than painting and the results are so professional looking! The total cost to stain the cabinets for under $200 and it looks like a completely new kitchen!
I must admit, while I do love the end result, I now HATE the wood in the rest of the house!
Update: I am currently staining all the baseboards, doors and windows to match!
Two years later and the kitchen still looks great! No chipping or peeling at all!
Here is the kitchen before:
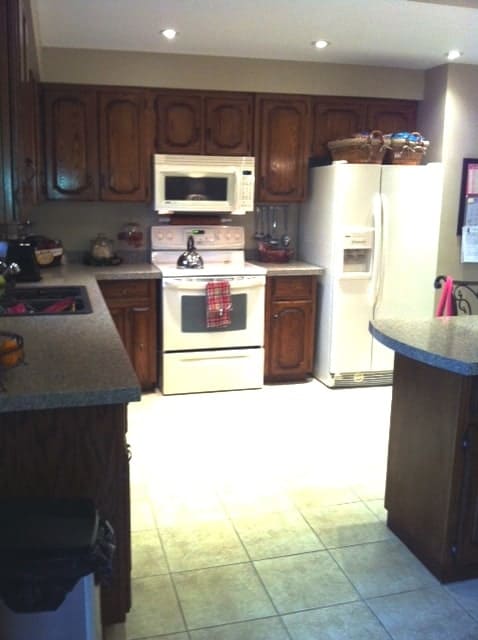
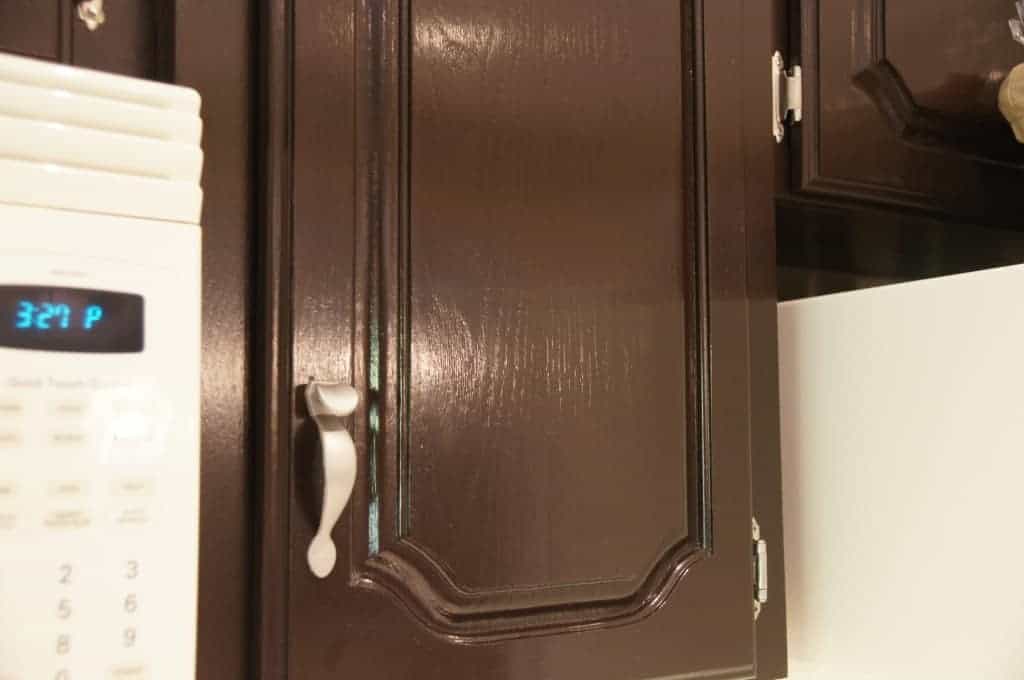
This 30 year old kitchen was still in great shape, but I HATED those dated cabinets. We decided to install a backsplash to update it a bit.
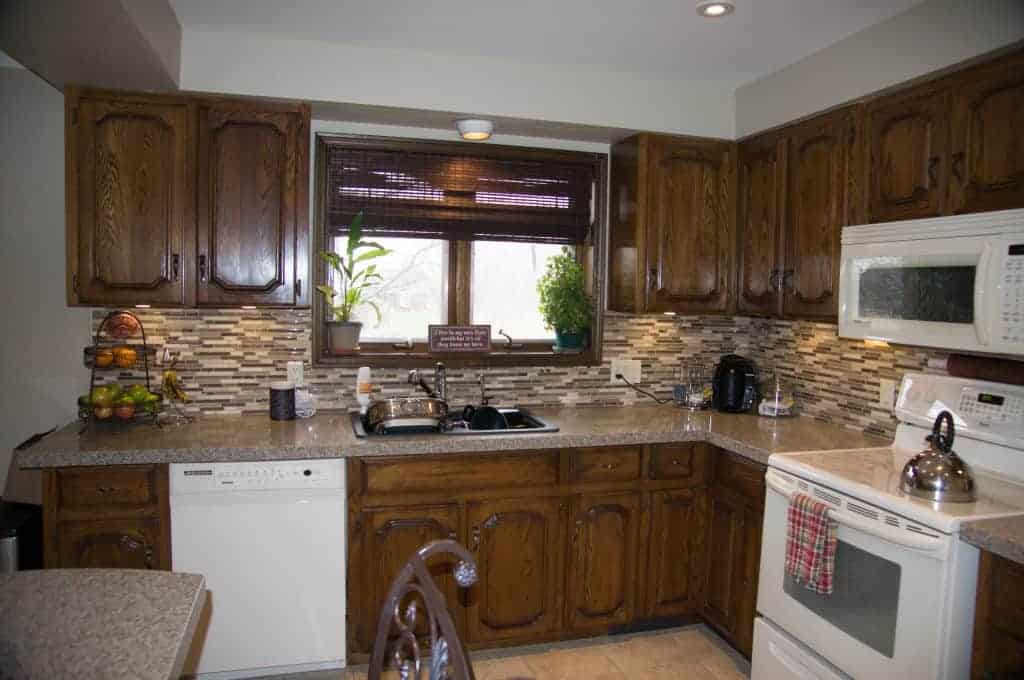
Better right? But the cabinets were still not my style.
I decided to gel stain them which was a very scary, scary project! It didn’t help that my husband was screaming “You’re wrecking our kitchen” through the entire process!
Yes, he loved the original cabinets!

I LOVE how they turned out! Now to convince my husband to let me do the window sill and the door in the dining room! Fingers crossed he goes for it….
I am posting the “HOW-TO” below if you are interested in doing this project for yourself!
HOW TO GEL STAIN YOUR CABINETS
CLICK HERE TO WATCH THE HOW TO VIDEO
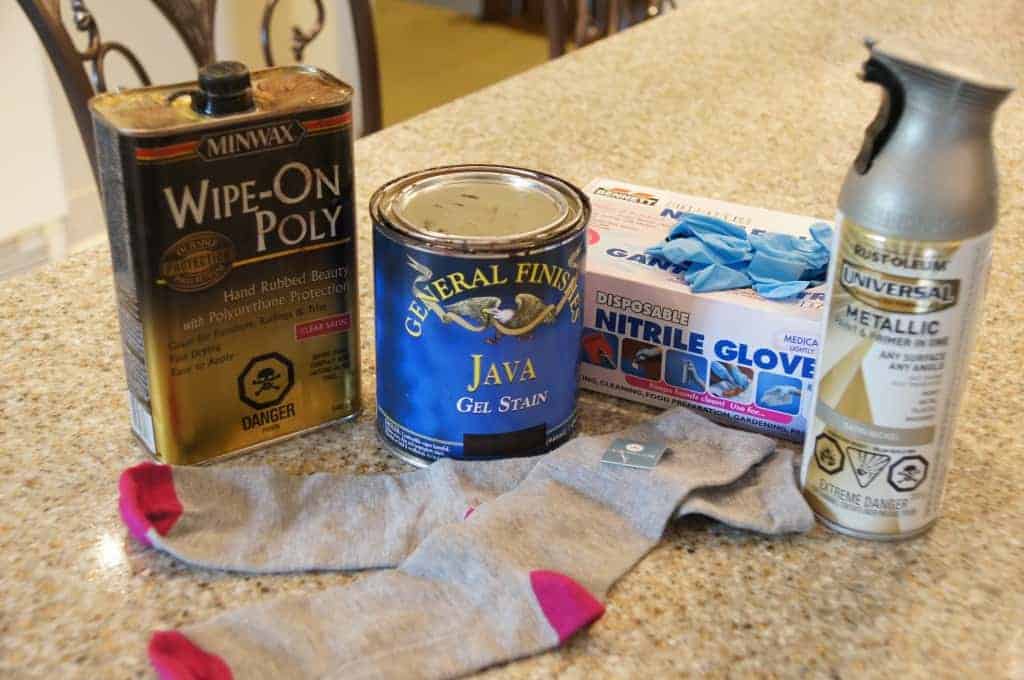
You will need gel stain (I recommend and used [easyazon_link identifier=”B001DSY50Y” locale=”US” tag=”clutterbug07-20″]General Finishes Java[/easyazon_link]), Poly (I used [easyazon_link identifier=”B000VZJGPO” locale=”US” tag=”clutterbug07-20″]Wipe On Poly in Satin[/easyazon_link]), socks (yes socks), [easyazon_link identifier=”B0013U75B8″ locale=”US” tag=”clutterbug07-20″]gloves[/easyazon_link], wood sanding block, [easyazon_link identifier=”B001JYVDSE” locale=”US” tag=”clutterbug07-20″]0000 steel wool[/easyazon_link], [easyazon_link identifier=”B00004Z4CP” locale=”US” tag=”clutterbug07-20″]painters tape[/easyazon_link] and paint thinner or mineral spirits for accidents! YOU MUST NOT SUBSTITUTE GEL STAIN! I tried soooo many different kinds of stain because I could not find General Finishes locally, but in the end, I ordered it online and it worked a thousand times better. Gel stain is more like a paint and does not actually penetrate wood! It can be used on fiberglass, plastic and just about everywhere else!
This will not work with regular stain.
STEP ONE:
Take the doors off and remove hardware. Make sure you tape off all areas around your cabinet boxes like the floor and walls. Lay your doors somewhere on a plastic drop cloth or sheet. Gel stain is thick and doesn’t drip like paint, so I didn’t lay down drop cloths on the floor.
STEP TWO:
Lightly sand the doors. I started with the back of the cabinet doors first (good practice). You are NOT stripping, just scuffing the doors. One minute of sanding per door is enough. Clean doors off after you have sanded. I used Lysol wipes!
STEP THREE:
Apply [easyazon_link identifier=”B001DSY50Y” locale=”US” tag=”clutterbug07-20″]gel stain[/easyazon_link] with a sock! Simply rub on thin, even coats going with the grain. Use the back of the sock to get any extra stain off and make sure to cover all edges and cracks. LESS IS MORE!
Let the stain dry 6 hours and then lightly rub with wet [easyazon_link identifier=”B001JYVDSE” locale=”US” tag=”clutterbug07-20″]steel wool[/easyazon_link]. Dry and Repeat with 4 coats of stain total.
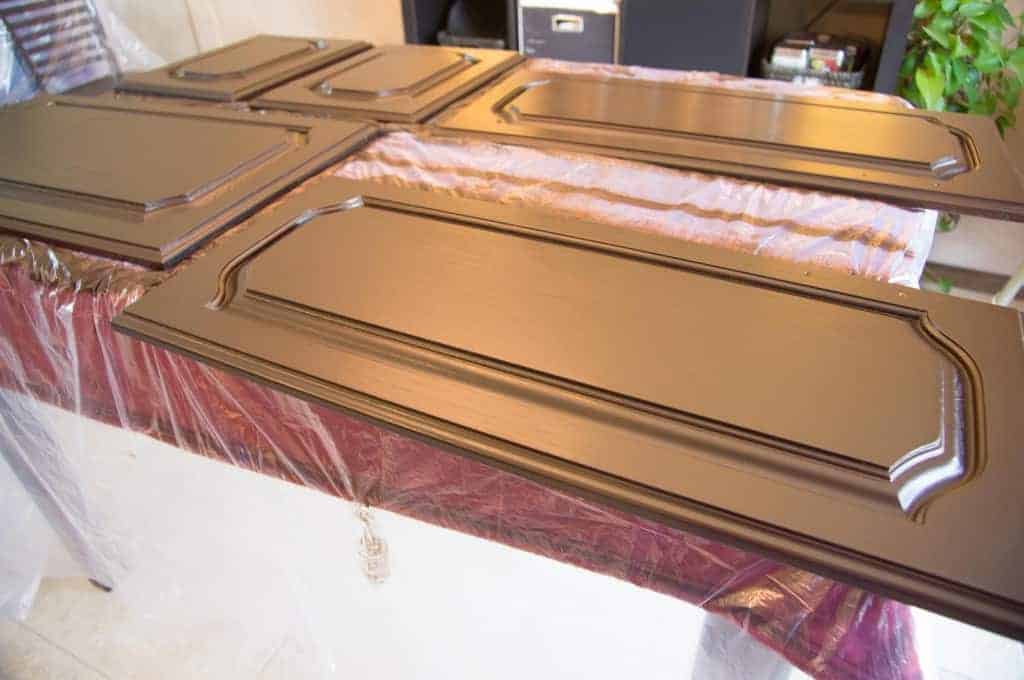
Here is after coat ONE on the boxes and drawer fronts:

STEP FOUR:
Let the final coat dry 24 hours and DO NOT rub with steel wool. Apply poly. I used [easyazon_link identifier=”B000VZJGPO” locale=”US” tag=”clutterbug07-20″]rub on Poly in a satin finish (gloss is WAY too shinny)[/easyazon_link] with a sock too! Let poly dry 6-12 hours in between coats. After each coat, rub with wet steel wool in direction of the grain lightly! Do not use steel wool after final coat! I recommend THREE coats of poly total.
STEP FIVE:
After the poly has dried for 24 hours you can reapply the handles and hang ( I just spray painted my handles with a [easyazon_link identifier=”B001943MGU” locale=”US” tag=”clutterbug07-20″]satin nickel spray paint[/easyazon_link]!) Be careful though, Poly takes up to a week to dry completely hard. If you nick the finish, simply use a small paint brush to touch it up!
FINAL STEP:
This is optional! I rubbed car wax on my cabinets and then buffed it off for added protection and water resistance!
That’s it! Time consuming as you wait in between coats, but easy and really, really worth it!
